Run an Experiment with ChaosIQ
This section explains how to configure and use Travis for running Chaos Toolkit experiments and publishing the results to ChaosIQ.
To be able to fetch assets from ChaosIQ, as well as pushing back results, for both experiments and verifications, you’ll need to setup a settings file with a valid token and selected targeted organization & team.
Please refer to these documentation links, to signin to ChaosIQ with a token and select your default organization and team.
Add the ChaosIQ Extension
You will need to add the ChaosIQ extension to the Github repository we setup in the previous section. Open the requirements.txt file and add the line:
chaosiq-cloud
pip install -r requirements.txt
This will install the plugin which will allow you to generate a settings file to use with Travis.
Configure the ChaosIQ Settings
You will need to create a settings file to use with our experiment. In your terminal window run:
(chaostk) $ chaos --settings ./settings.yaml signin
  ChaosIQ Cloud url [https://console.chaosiq.io]:
  ChaosIQ Cloud token:
  Experiments and executions will be published to team 'Staging' in organization 'ChaosIQ'
  ChaosIQ Cloud details saved at ./settings.yaml
When the signin command prompts for the token paste in your token for ChaosIQ.
Warning
The settings.yaml contains sensitive information and must not be committed to your Github repository, add it to your .gitignore file now.
You can if you wish run your experiment locally to confirm that it will publish your execution to ChaosIQ with the settings file you have configured, if you wish to do this run:
chaos --settings settings.yaml run experiment.json
You can the login to ChaosIQ Executions page to confirm your execution has been published.
Encrypt the Settings File
As mentioned above the settings file contains sensitive information and should not be pushed to your Github repository. Travis has a feature to enable you to encrypt a file then use that file as part of you job execution on Travis, this is detailed in the Travis Documentation.
Install the Travis CLI
To encrypt a file and to use that encrypted file on your Travis build you will need to install the Travis CLI, see the Travis CLI installation instructions. Once installed you will need to use the Travis CLI to login in to your Travis account with the following command:
travis login --com
You can now encrypt the settings.yaml and the Travis CLI will share the secure encryption variables with you Travis account. Encrypt the settings file with the following command:
travis encrypt-file settings.yaml --add --com
Note
In the above output gtfisher is the Travis account name and travis-test is the name of the Github repository.
This encrypts the settings.yaml file into settings.yaml.enc, it also setups secure environment variables for decryption and updates the travis config to use those environment variables.
You now need to update the chaos run command in the .travis.yml file so it uses the settings.yaml file that will be decrypted from the settings.yaml.enc when the build runs. In the .travis.yml change the chaos run command to:
script:
 - chaos --settings settings.yaml run experiment.json
Run the new build on Travis
You now need to commit the following files your Github repository:
settings.yaml.enc
requirements.txt
.travis.yml
.gitignore
This will cause a new build to be triggered. If you go to the Travis console you will see the job executing and eventually the output from the job execution:
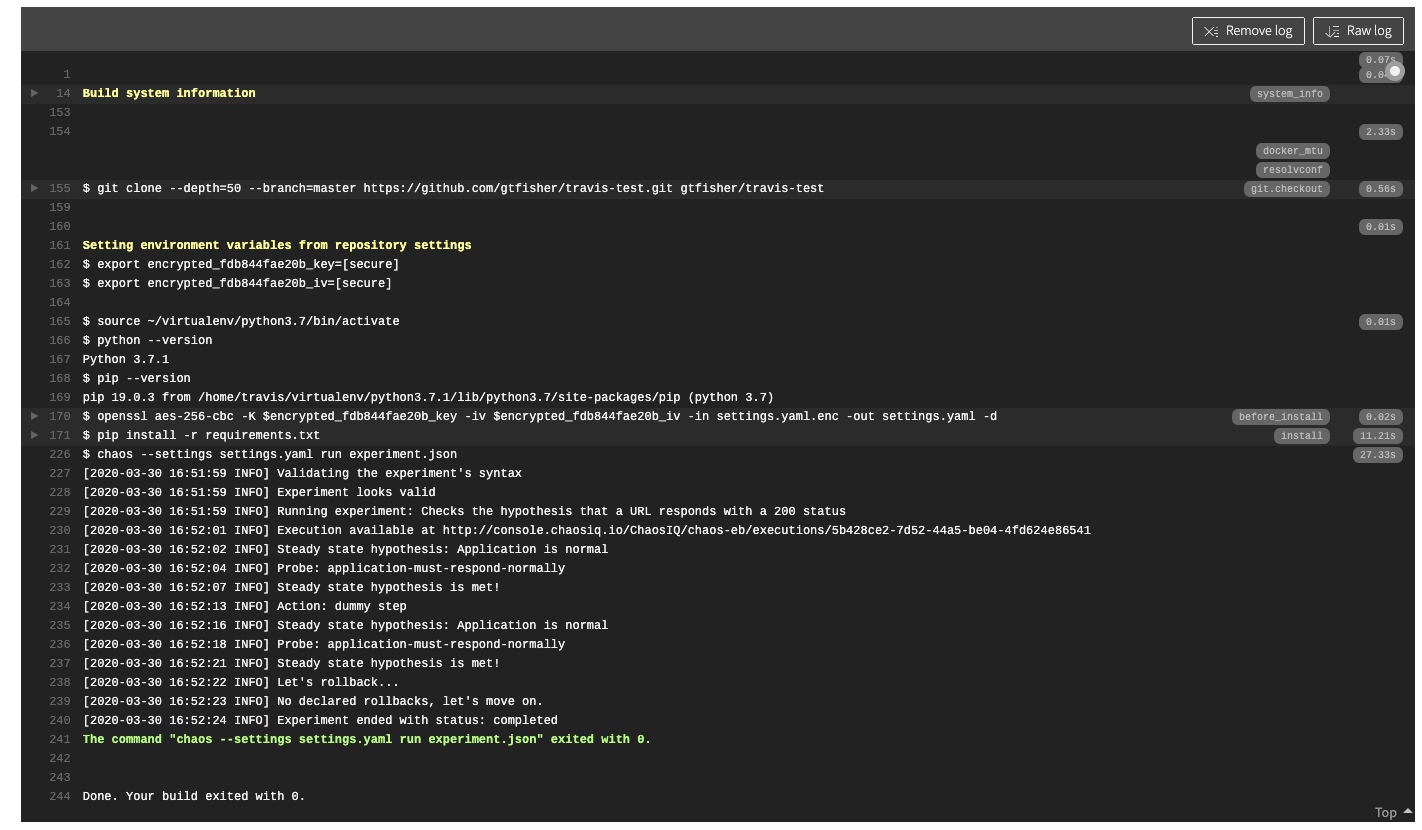
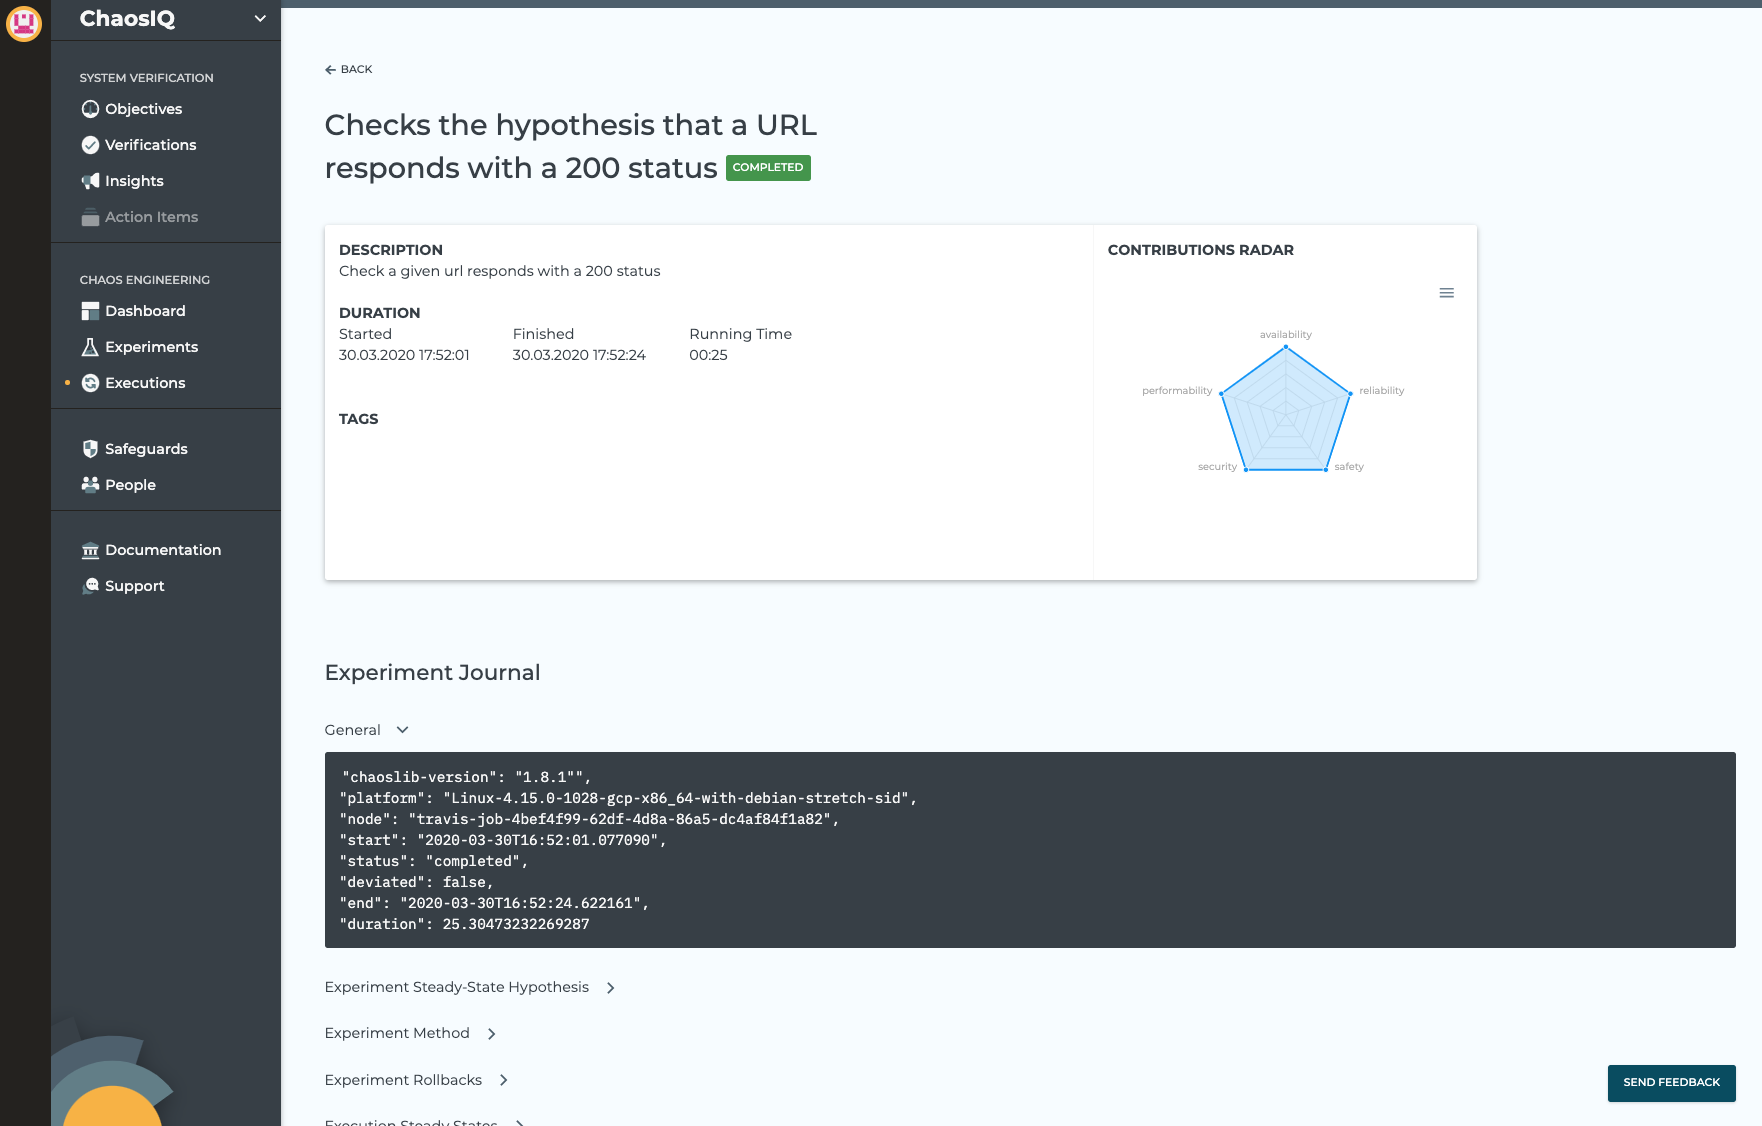
The output shows at the top the two secure environment variables and shows the output of the experiment running. This includes the information that the experiment will be published to ChaosIQ and lists the URL when the execution is published to. If you navigate to that URL you will see a detailed view of the execution, if you expand the General section and you can confirm the execution is part of a Travis job:
Note
If you want to run a Verification instead of an experiment all you need to do is add a verification file to the Github repository and change the chaos run command with chaos verify. The Verification will run as part of the Travis build and the results will be published to the Insights view on ChaosIQ.
In this section we have:
- Added the ChaosIQ plugin by updating the
requirements.txt. - Created a
settings.yamlfile and encrypted it for use on Travis. - Updated the
.travis.yamlfile to use the encrypted file and change the chaos command to use the settings file. - Pushed the changes to the Github repository to trigger a build
- The build has executed and published the execution on the Executions page on ChaosIQ