Create your first Objective
Ensure you have a team selected using the drop-down at the left of the ChaosIQ console.
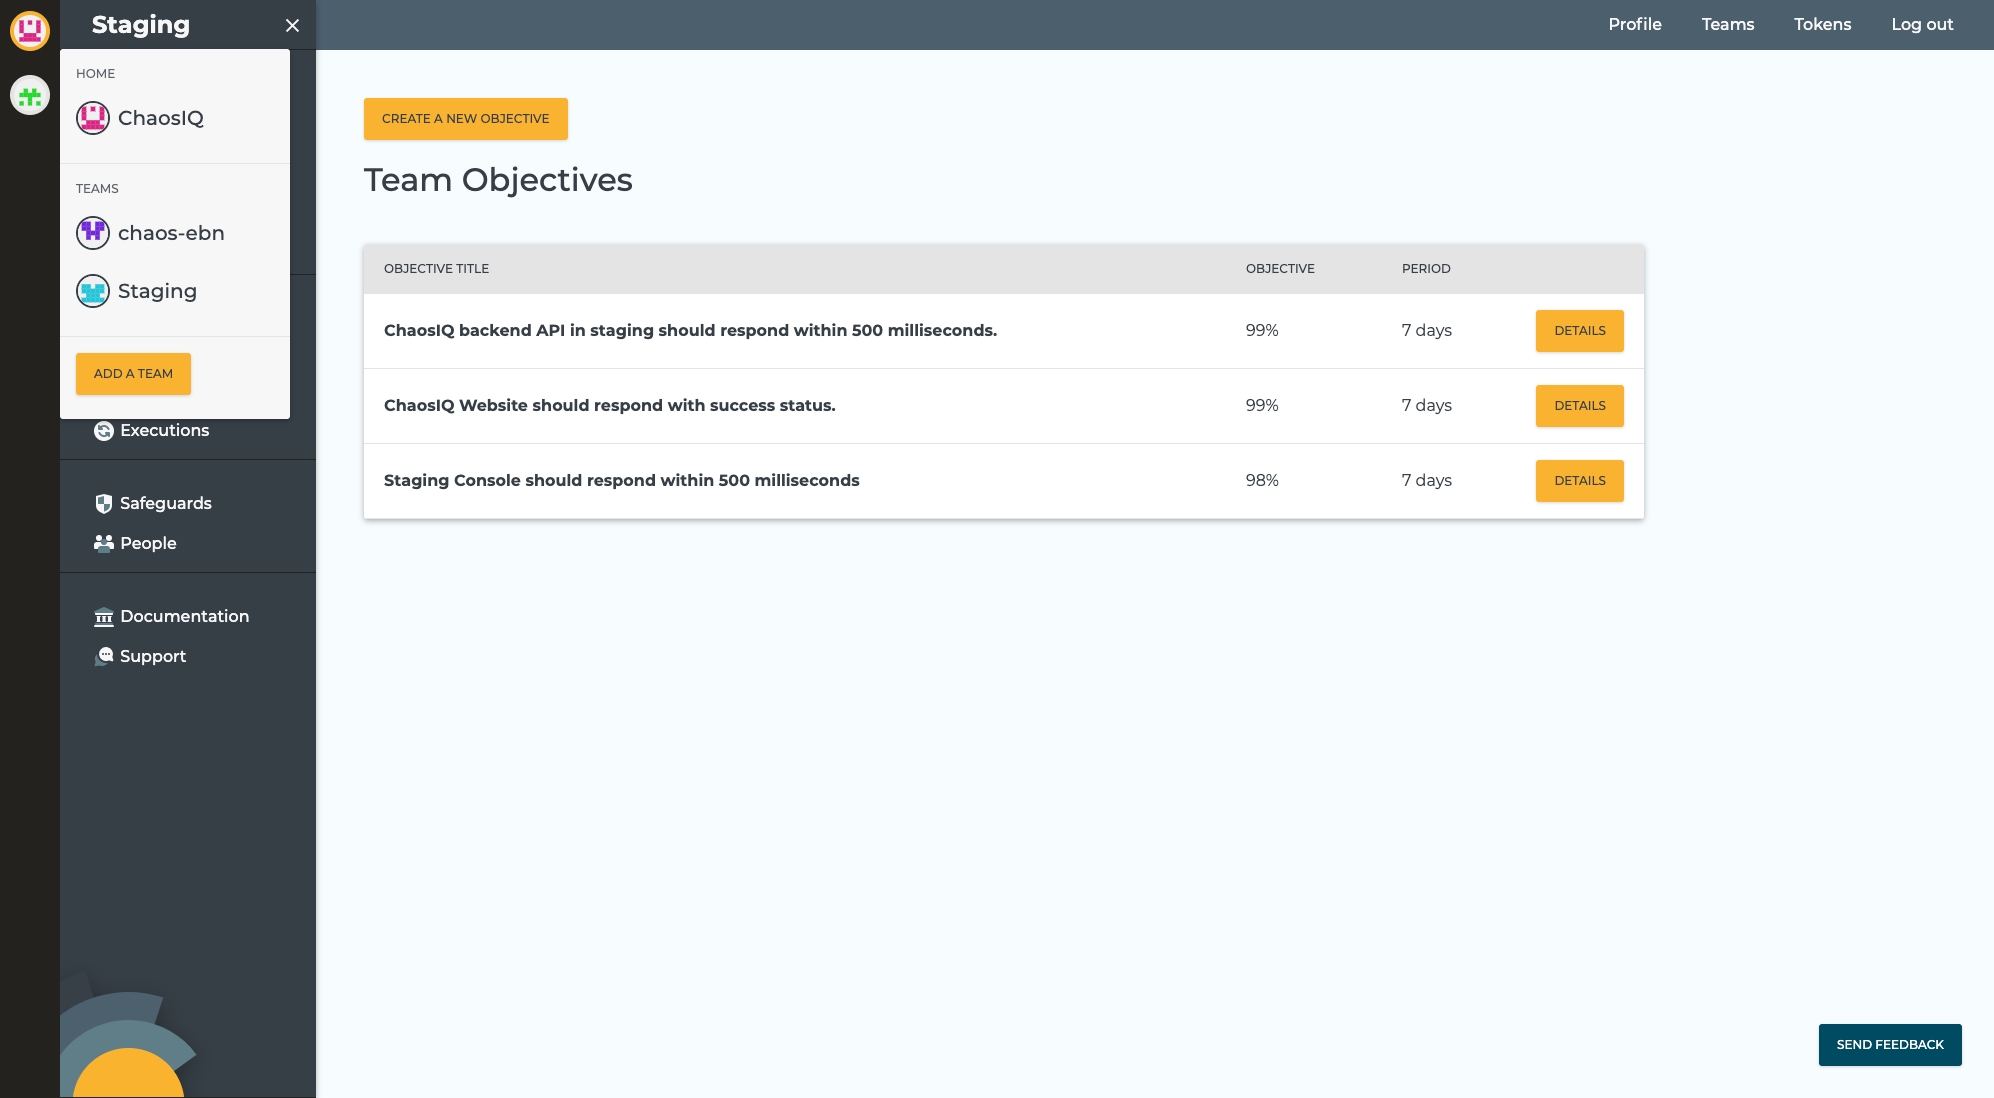
Then navigate to the Objectives page and click the Create a New Objective button.
On the Objective form specify an Objective you care about for your system. First you need to add a meaningful name for your Objective. An objective’s name should mean something of value to the business or to your customers. You can also add an optional description to elaborate on your Objective.
You can optionally add a tag to your Objective. Tags are used to filter objectives when you are managing many Objectives.
You now specify the most important part of your objective which is a target percentage availability over a specified period, an example could be 99.5% available, over a period of 7 days. The target availability is less than 100% so this leaves a margin for error, which can be considered the Error Budget.
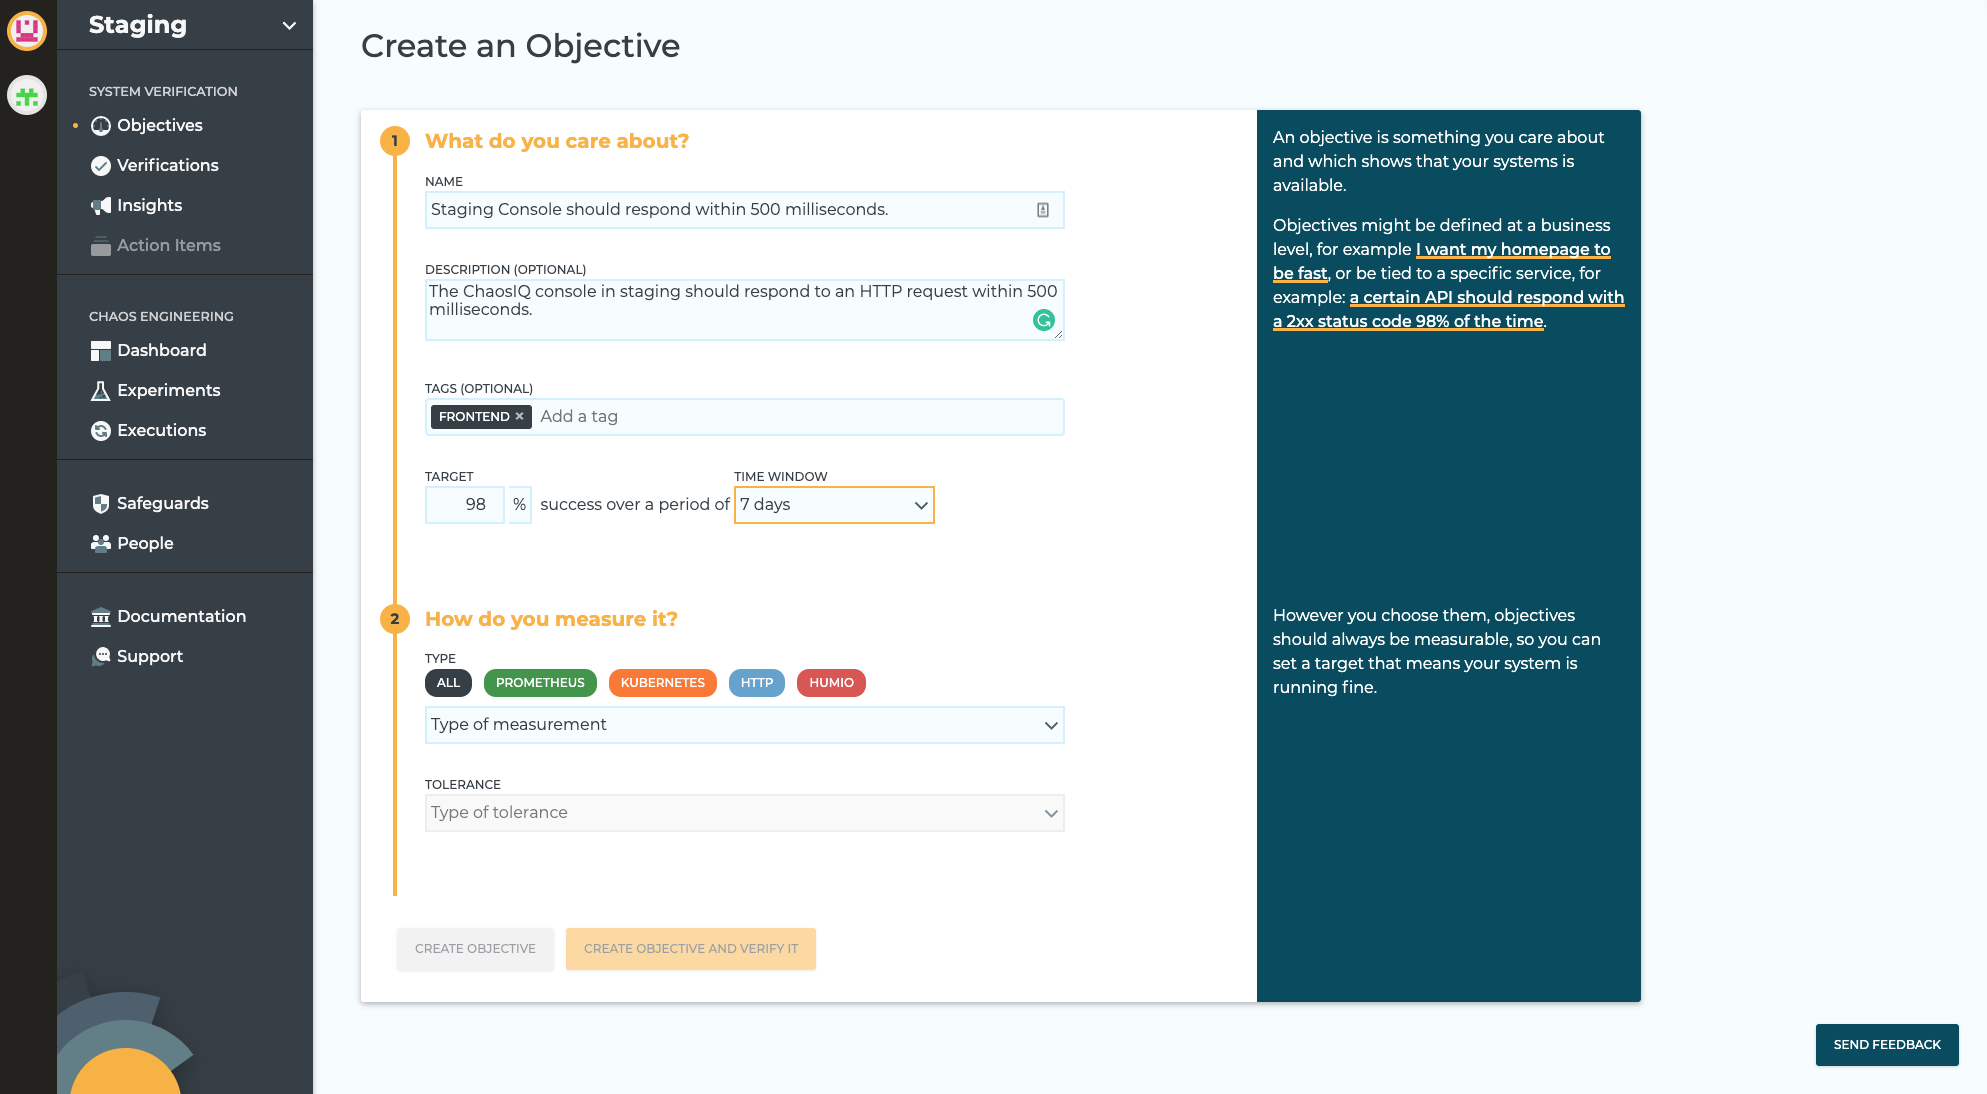
The next step is to identify how you would measure your Objective. This is something in your system that you can measure as an indicator that the system is meeting its objectives. In ChaosIQ, select the drop-down menu for the type of measurement.
Note
Currently there are a limited number of options for the type of measurement but these should expand over time as ChaosIQ evolves.
Select a measure from the drop-down such as HTTP status code.
The fields displayed on the Create Objective form will dynamically update depending on the drop-down field you have selected. For HTTP status code you will be able to enter a URL you are going to probe and a tolerance for that probe.
The tolerance can be either HTTP Status Code Check where you will specify an explicit expected status code as a response. Alternatively, you could select a range of HTTP Status codes, where you specify a lower and upper bound for the expected response code.
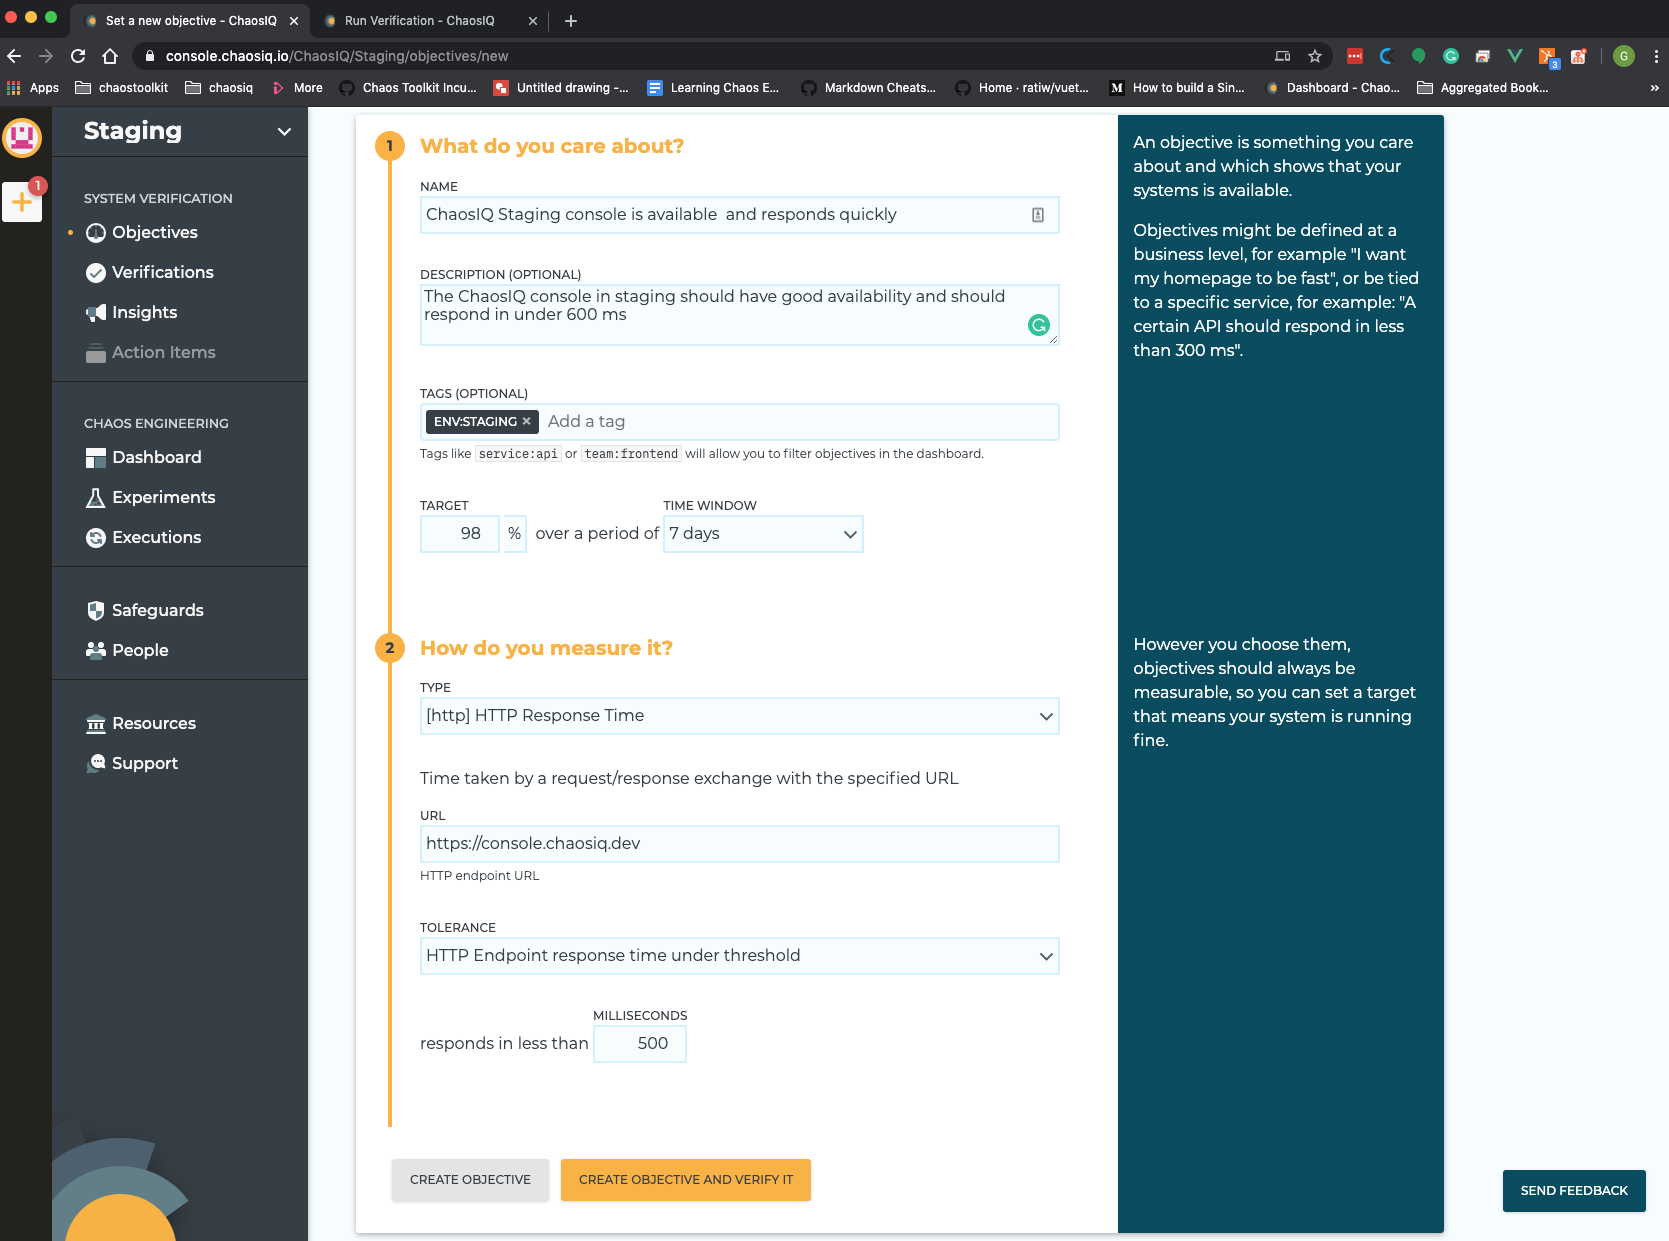
Having identified how you are going to measure your objective select the Create Objective and Verify It button to complete your objective and it will take you to the Create a Verification form.